Mini purses are so in fashion right now. I never had one or was interested in having one until recently while traveling. All the needed daily stuff were held in my boyfriend’s backpack but it was annoying and time wasting to stop, open and close it for lipstick, photo camera, napkins, map and for a small amount of cash for water or a snack… as a result I decided to make one once I’m back home!
I forgot about it until I received some leftover cotton yarn and in combination with just learned basket-weave crochet stitch I got quite nice result; also stitching the strap based on ‘tubular bead crochet’ (without the beads) technique I’m quite impressed by getting a cute small purse without going through any trial-and-error process 🙂
Materials and Tools needed:
- Cotton yarn (King Cole Bamboo Cotton DK)
- Steel hook size 2.5mm
- Scissors
- Optional: cotton fabric and zipper, similar colour with the yarn (+ sewing machine)
Final Size:
- Pocket purse: 15cm (5.9in) wide and 17cm (6.7in) tall
- Strap: 118cm (45.7in) long
Terms (US)
- ch: chain
- spst: split stich
- sc: single crochet
- hdc/s: half double crochet/s
- FPdc: front post double crochet
- BPdc: back post double crochet
- st/s: stich/es
PURSE’s POCKET
Chain 32 + 2. Total 34chs
Round 1: 1hdc into 3rd ch from hook, 1hdc into next 30chs, 2dc into next ch, turn the chain and work into the other side of the chain towards the starting point, 1hdc into next 31chs, spst into the 2ch (representing 1dc) at the beginning of the row.
Round 2: ch3 (counts as 1BPdc), turn (1FPdc in next 4sts, 1BPdc in next 4sts) times 7, 1FPdc in next 4sts, 1BPdc in next 3sts, spst into the top ch at the beginning of the row
Round 3: ch3 (counts as 1FPdc), turn, 1FPdc in next 3sts, 1BLdc in next 4sts, ( 1FPdc in next 4sts, 1BPdc in next 4sts) times 7, spst into the top ch at the beginning of the row
Round 4: same as row 2
Round 5: ch3 (count as 1BPdc), turn, 1BPdc in next 3sts, 1FP dc in next 4sts,(1BPdc in next 4sts, 1FPdc in next 4sts) times 7, spst into the top ch at the beginning of the row
Round 6: ch3 (count as 1FPdc), turn, (1BPdc in next 4sts, 1FP dc in next 4sts) times 7, 1BPdc in next 4 sts, 1FP dc in next 3sts spst into the top ch at the beginning of the row
Round 7: repeat row 5
Rounds 8 – 19: repeat rows 2-7 two times
Rounds 20 – 22: repeat rows 2-4
Rounds 23-24: repeat rows 5-6
Round 25: spst around, fasten off* and secure the thread
STRAP
Working in continuous rows!
Leaving approximately 25cm (10in) yarn create an adjustable ring
Round 1: Into adjustable ring* 2sc and 1hd
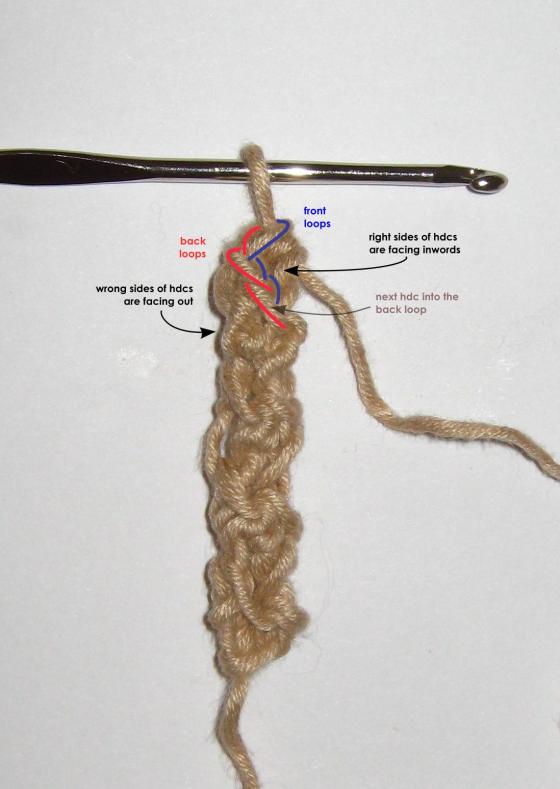
Round 2: (refer to the below photo) facing the right side of the stitches (the wrong sides are the outside) 1hdc into the back loop of the first sc of previous row (the back loop is facing you, the front loop is in the inside the work), continuous stitching 1hdc into the next two back loops (which are actually facing you)
Repeat row 2 until you reach approximately 120cm (47.2in) length; to finish off, work 1sc into next 2sts, fasten off* leaving 25cm (10in) yarn.
Sew 2.5cm (1in) of strap edge into inside of the bag at each side using the yarn left on the straps edges.
* Please check the Amigurumi adjustable ring and 2 ways to Fasten off posts.
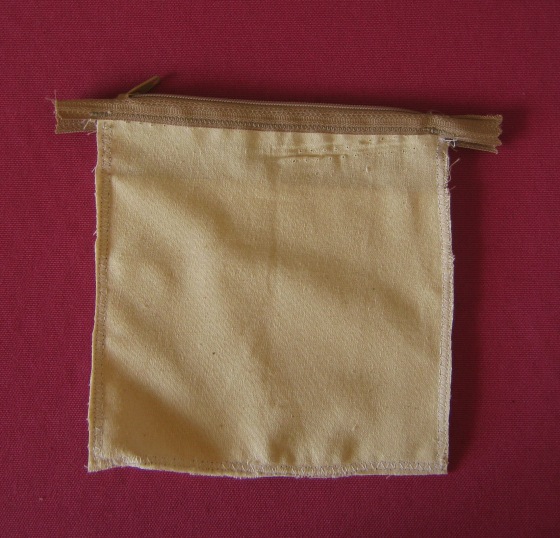
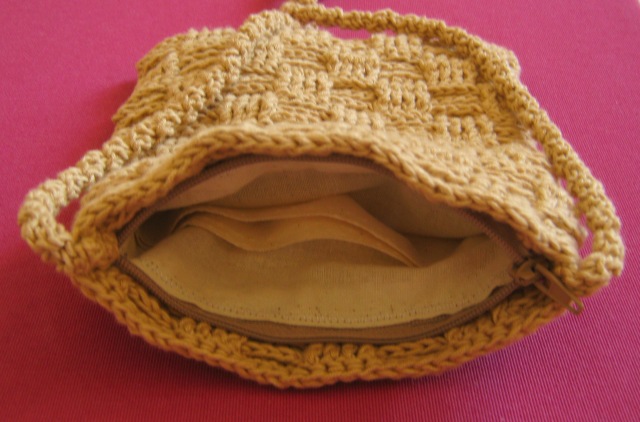
Optional: sew a mini compartment with a zipper and sew it inside the bag making sure it is sewed onto the straps edges inside; This way you will prevent downward stretching of the bag and of the upper sides close to strap in case you will be carrying any small but heavy items.
Enjoy and Happy Crocheting 🙂
PLEASE NOTE:
You may not copy, resell, translate, post on the internet or redistribute (fully or partially) this pattern.
If you would like to sell finished items made with this pattern please contact me in advance and mention that the item is ‘based on the pattern designed by Toma Creations’
Mass production and Internet sales of the finished item based on the pattern are not allowed.


I love the look!!
LikeLike
I am confused on the strap. Not quite sure how to get this but I am LOVING the pattern!!
LikeLike
looks very nice. Thanks for the explenations
LikeLike
I made a two-color one, green and black.
I didn’t get the strap but I found another that will fit perfectly
Thank you!
LikeLike
great! i would love to see some pictures, you can share them on raverly
LikeLike
I would like to use this pattern for the basis of a small purse for my niece (a rose basket). I would post the finished product and some in progress shots on my blog.
I would not post the pattern, rather, I would like to link to this page if you will grant me permission.
LikeLike
Hi there, definitely you can link my pattern to you post. thanks for being interested in the project and contacting me 🙂
LikeLike
Is this piece worked in the round? In other words, when you say to “turn” are you just working the opposite side like in the first round or do you turn the entire piece over to work Iin the direction you just came from?
LikeLike
hi Lydia, the “turn” means turning the entire piece over and working towards the direction you just came from 🙂
LikeLike
Thank you for the clarification & for posting the pattern. It’s lovely!
LikeLike
Love this but I’m just confused. Its not worked in the round then how does the other side get made?
LikeLike
Hi Angel, thanks for noticing, it’s actually worked in rounds, i’ve changed “Row/s” to “Round/s”. hope this clears the confusion 🙂
LikeLike
thank’s for the pattern. now, i am trying to make it.
LikeLike
my pleasure, enjoy 🙂
LikeLike
Pingback: Korgvirkad miniväska – Erika virkar
Do I make 2 and sew together or does it get folded?
LikeLike
it is worked in rounds, one piece, you will need to turn at the begging of each round (all indicated in the instructions).
LikeLike
Pingback: One Of My Favorite Crochet Sites: Toma Creations – Astraia Sky Designs