
I’ve been troubled a lot by our cats’ litter box. It takes space, it is not that appealing and most importantly litter being spread around and even entering the house has not been the most pleasant thing!
This is the best, and I hope my last cat litter box & furniture DIY project. Before this we used to have a huge (spaceship look alike) litter box with a large grass mat underneath to catch any litter. It was taking up almost all our balcony space. Before that our cats had even been toilet trained but they hated it and we felt sorry for them.
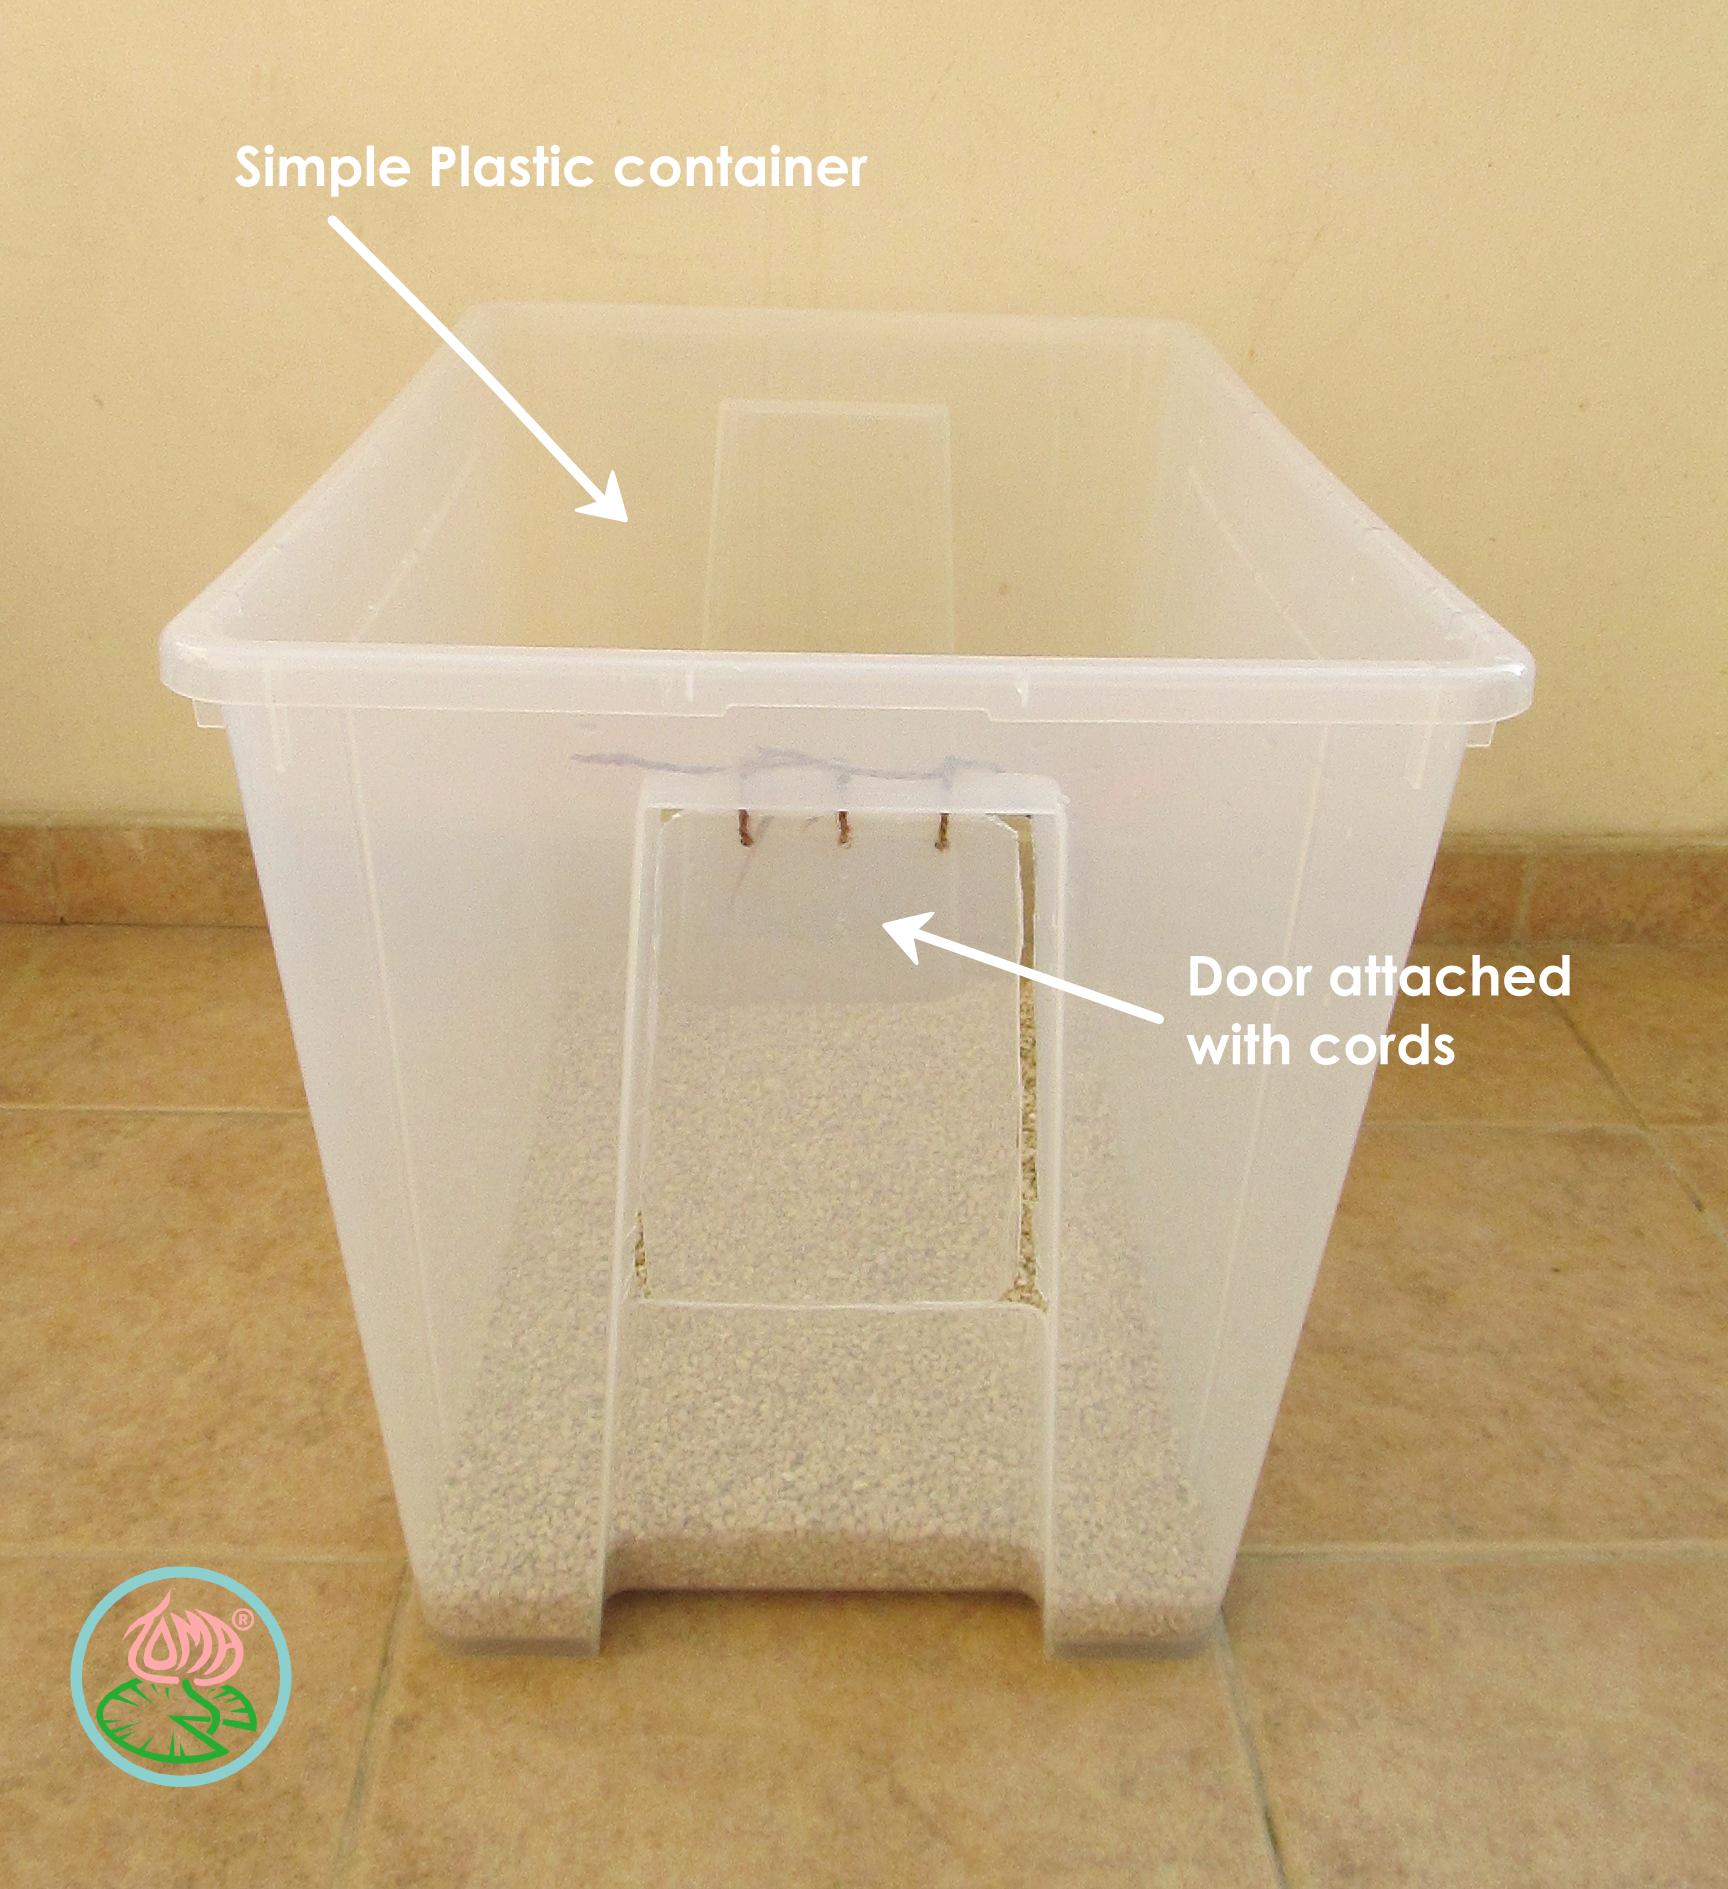
In this post you will find instructions on how to make a litter box out of a simple container & hiding furniture out of a babies’ changing table.
These projects are quite simple but require some time investment and an afternoon is more than enough for both.
What you need for the litter box:
- A large plastic container, preferably transparent as this helps the litters’ drying process and in addition it is easy to see when cleaning is needed, I’ve used Ikea’s one (Samla)
- Cord
- Sharp cutter
Instructions:
- With the cutter cut a space in front of the container, approximately 21cm high x 14 wide
- Optional: The cut-out part is going to be used as a door. You might need to cut all the sides by 0.5cm further so the door can swing easily in and out. The door prevents litter to be fall out when the cat scratches within the container
- Make 3 holes on top of the door and on the container. You can drill them or you can use a large heated needle that can melt the plastic
- Attach the door to the container by passing cord through the holes and make sure the door swings
- That’s it!
What you need for the litter box furniture:
- Baby’s changing table, I got mine from Ikea (Sniglar)
- Simple fabric approximately 1 square meter (Ikea’s Bomull)
- Sewing machine or thread and needle
- Door mat (Ikea’s Oplev)
- Cord
- Cat litter box
You can find and use any product or furniture for the same purpose, i refer to Ikea’s products as these are the ones I’ve used and you can find more detailed descriptions and dimensions of each item.
Instructions:
- Assemble the changing table
- Sew the curtain. Mine is 1m wide and 84cm long (this includes 2cm for passing the hanging cord)
- Place the curtain on the cord and attach the cord to the changing table (I’ve placed it under the top screws, no glues no nothing just the cord is twisted tightly under the screws)
- Cut the door mat so it can fit on the shelf and place it in
- Optional: on one side create a border with a cord, this is created to prevent our cats exiting directly from the litter box. With this maneuver they need to go through a small corridor behind the curtain to exit from the other side and minimize the litter falling outside the mat and the furniture
- Create or place the cat litter box on the mat and
- Voila it’s done


When the curtain is closed our cats enter and exit from the other side of the table, this way most of the litter after visiting the box is caught on the mat.

ingenious solution – I Love It! Thanks for sharing 😀
LikeLike
Thank You for a very useful and practical solution.
LikeLike
clever, but I would go one step further and wrap some sisal cord around all the legs (secure with hot glue), and make scratching posts
LikeLike
Pingback: Top 20 Diy Cat Litter Box Furniture – Home, Family, Style and Art Ideas
Pingback: 8 Homemade Litter Boxes for Large Cats – Plans You Can Make Today | Hepper